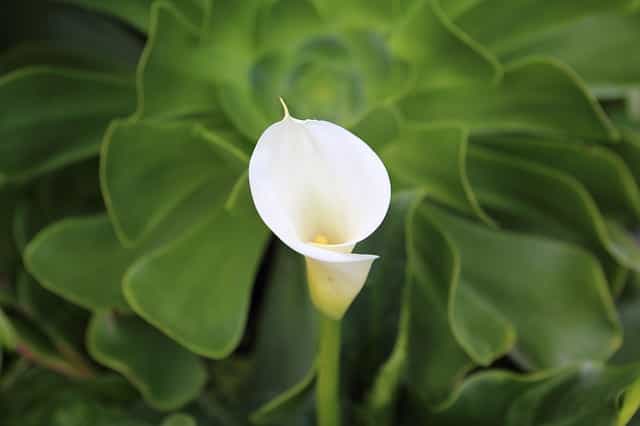
Calla lilies are exquisite flowers that serve as a piece of good luck at weddings. Although not lilies, these plants are a beautiful addition to your garden.
In most cases, they can bloom all year long if given proper care.
These plants are native to South Africa and require warm temperatures and sufficient watering, and in turn, they provide you with beautiful flowers.
The leaves of a healthy calla lily plant are dark green that compliments the flowers to increase the aesthetic value of your garden.
Why are my calla lilies leaves turning yellow?
Calla lilies do not require you to fuss too much over them and are perennial if provided stable conditions. This gorgeous plant produces funnel-shaped flowers and has deep green colored leaves making it one of the most beautiful plants in your garden.
However, sometimes you might start to notice that the leaves are starting to turn yellow. If you are worried about the same, the reasons behind this problem are:
1. The leaves are dying
Nothing to be alarmed about. It is the most common reason behind calla lily leaves turning yellow. Calla lilies are native to swampland.
In those regions, during summers, the swamp would dry, which leads to drying up of the calla lily foliage, and eventually, the plant goes into a dormant stage.
The plant in your garden might also be going through its natural course of habit. (This means it is not your fault!) If your plant is going through this stage, the leaves will turn yellow, then brown, and then all the leaves die.
If this happens, do not worry and keep watering your plant less than usual for some months. And when you notice new leaves coming up, switch to the original watering schedule.
2. Chlorosis
Chlorosis is a term used to describe the yellowing of the leaves of a plant due to a lack of chlorophyll. The probable reasons for this can be poor drainage, damaged roots, or nutritional deficits in the plant.
The deficiencies are due to a lack of nutrients in the soil. Or, sometimes, the root is damaged to absorb them from the soil.
Chlorosis is usually due to a lack of iron in the plant. To recognize this, check what part of the plant is affected by chlorosis first.
Iron deficiency starts by affecting the new and terminal leaves and spreads to the older ones. A deficiency of magnesium or zinc can also cause chlorosis.
However, if it is because of them, then the older and inner leaves are affected first, slowly spreading outwards.
These nutrients are present in soil within the normal pH range. If the pH is more significant than 7.2, these nutrients are not there in the soil anymore. So, the first step towards treating chlorosis is to check the pH of the soil.
If you can figure out the reason behind the chlorosis, you can treat the plant accordingly. If you give the proper remedy in time, the calla lily plant bounces back fairly quickly.
3. Improper care
Calla lilies need special care after they are transplanted to avoid the after-effects of transplant stress. If you have transplanted a calla lily plant, some of its leaves will likely die in the process.
The roots take some time to get used to the new place. So, if the old leaves turn yellow, you can just cut them off.
The new leaves will eventually grow after the roots become accustomed to the new soil. During this time, take care of the other needs of the plant-like watering regularly and providing sufficient sunlight.
4. Windy environment
The place where you have kept your calla lily plant must have a calm environment. Heavy winds or drafts might cause wilting and yellowing of the leaves.
If a fence surrounds your garden, you should keep this plant in the corner, and you should protect it from all sides. This plant is as delicate as it looks!
5. Adding cow manure
Sometimes, what you think is promoting the plant’s growth might create more problems for it. Cow manure is rich in sodium, so adding it to the soil might lead to a salt overdose in your plants.
If you have added this manure to the soil, you have no other option than to repot the plant. You have to carefully uproot the plant and place it in another pot with fresh soil to reduce the transplant stress.
6. Root rot
This plant is highly susceptible to root rot, and this is a very likely cause of discoloration of the leaves. If you provide enough sunlight and adequate water and still this problem is arising, you need to check the moisture levels in the soil.
If you want to get an accurate measurement of moisture level in the soil, you can use a hygrometer. But for the DIY people, you can determine it by putting your finger in the soil.
The pot in which the calla lily plant is potted should have enough drain holes to allow proper drainage.
Also, if you are repotting this plant, do not plant it very deeply. Pot it in a way that the base of the stem is above the soil, not beneath it.
How to take care of your calla lilies leaves?
After learning about the potential reasons behind the yellowing of leaves of your beloved plant, you might be wondering how to avoid them. Here are some of how you can take proper care of your calla lilies leaves:
1. Proper watering:
Calla lily plants do not care for overwatering. The soil should dry between different watering sessions. These plants should not be allowed to sit in water for a long time.
Water in the morning is preferred overwatering in the night.
It is because when you water at night, the roots have to sit in wet soil overnight. However, it dries out quickly in the morning, and roots do not sit in the water for long.
2. Proper soil and pot
Use well-draining soil that is rich in all the nutrients. Make sure the pot has enough drain holes to drain the excessive water. You can keep the plant in a tray that can hold the water flowing from the drain holes to avoid a mess.
3. Transplant carefully
When you transplant the calla lily plant, do not plant it too deep such that the base of the stem goes inside the soil.
It increases the chances of root rot. Make sure to plant the rhizomes carefully so that they do not cause permanent damage to the growth of leaves.
4. Winter care
The leaves of the calla leave plant start to turn yellow and die in the autumn season.
When this happens, cut down the dead leaves of your plant and store them in a warmer environment. Water it infrequently during this period. Store these plants at a temperature of at least 10 degrees Celsius.
Conclusion
Calla lilies are beautiful plants that not just light up a wedding but also your garden. It is a bulb plant that produces gorgeous flowers.
So, it is a problematic idea when its leaves start to turn yellow. But that does not necessarily mean the plant is in trouble.
Even if it is, you can generally fix it easily. Find out why the leaves of your favorite plant are yellowing and cut out the problem from the root (Not literally!).